

Quick start
A subgraph takes only a few minutes to set up. To get started, follow these three steps:- Initialize your subgraph project
- Deploy and publish
- Query from your dApp
1. Initialize your subgraph project
Create a subgraph on Subgraph Studio
Go to the Subgraph Studio and connect your wallet. Then click Create a Subgraph. When you enter the subgraph name, use Title Case: “Subgraph Name Chain Name.”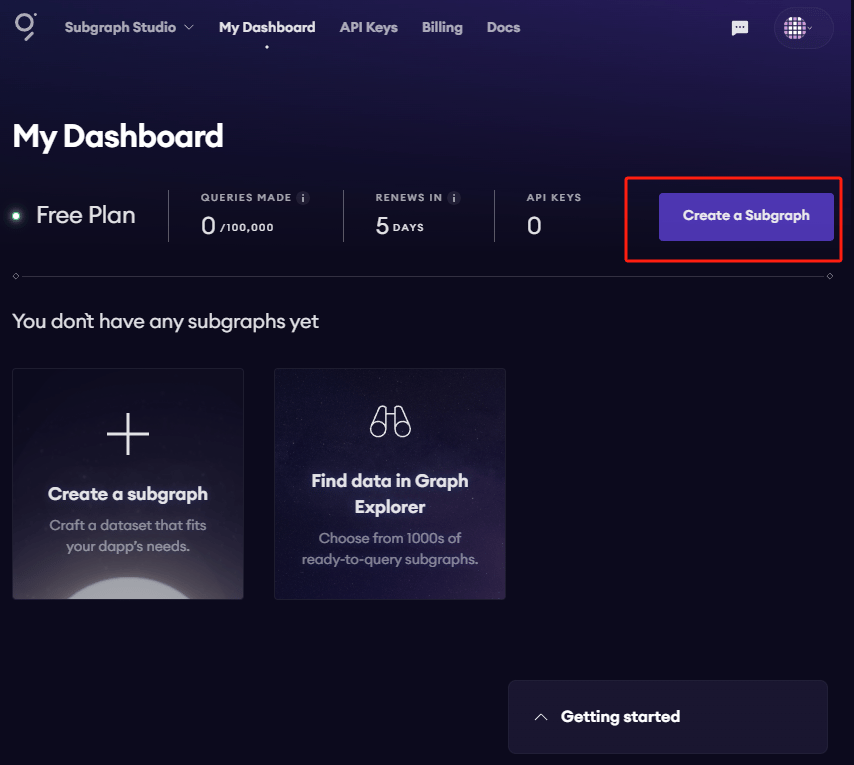
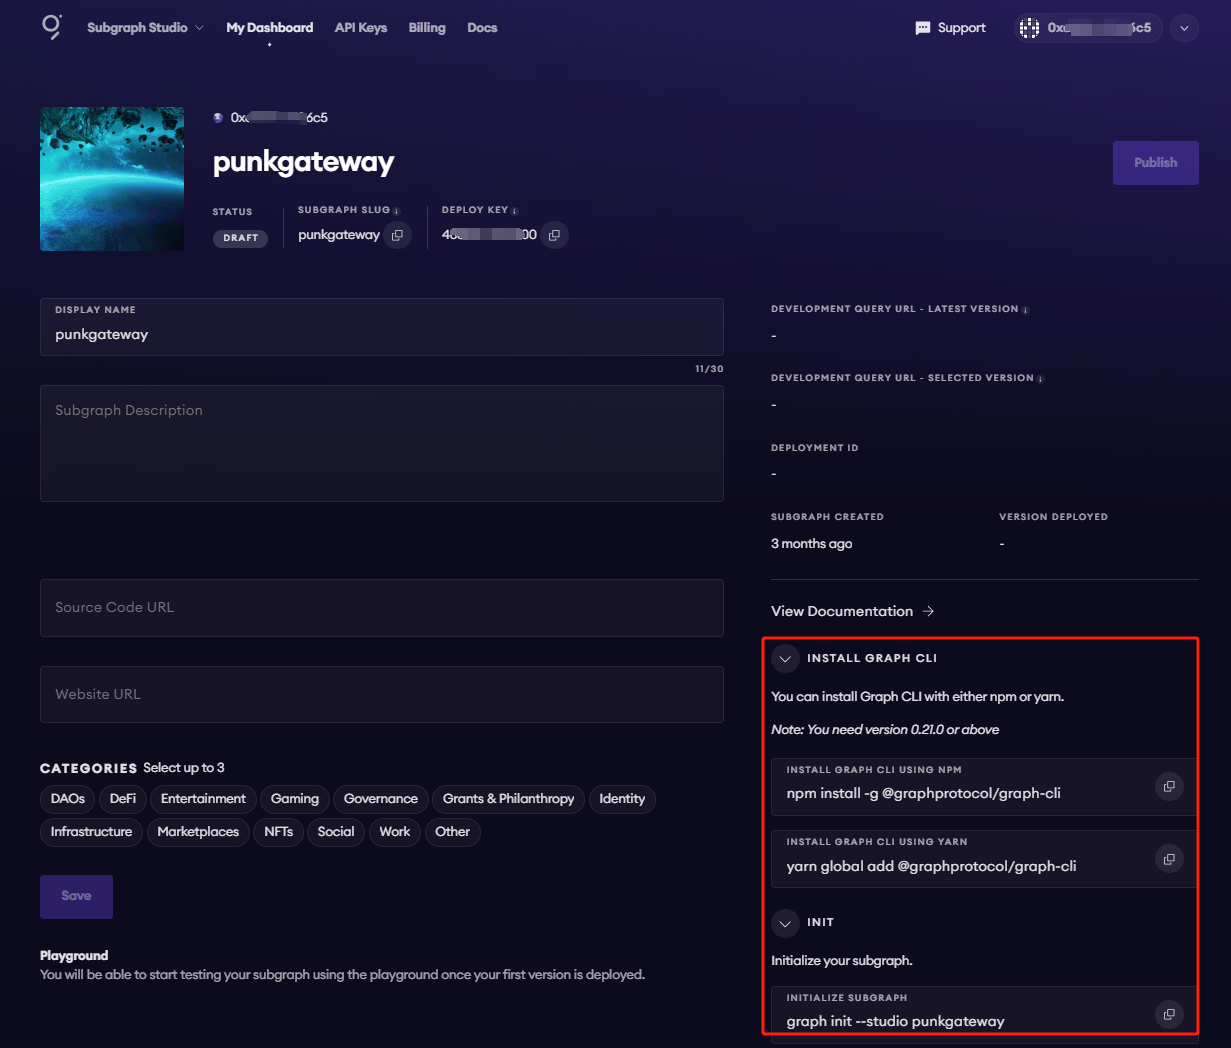
Install the Graph CLI
On your local machine, run this command:Initialize your subgraph
You can copy this command from your subgraph page. The copied command includes your subgraph slug: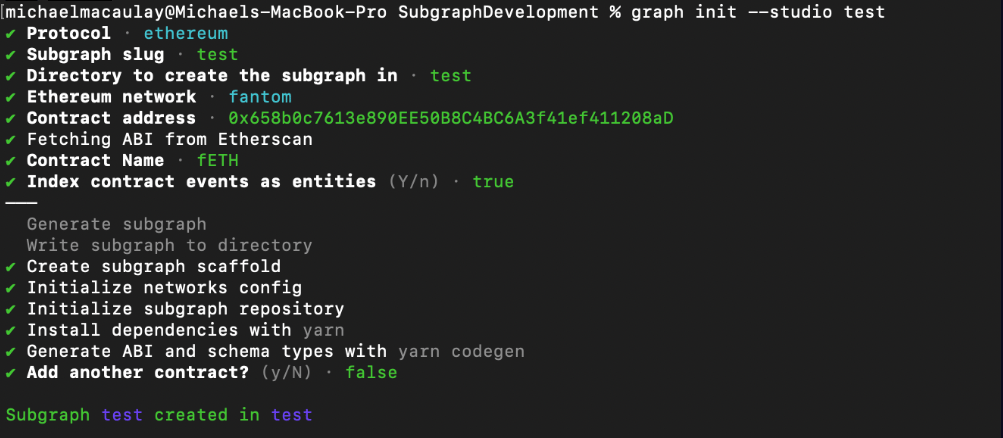
2. Deploy & publish
Deploy to Subgraph Studio
First, run these commands:Test your subgraph
You can test your subgraph with a sample query in the playground section. The Details tab shows an API endpoint. You can use that endpoint to test from your dApp.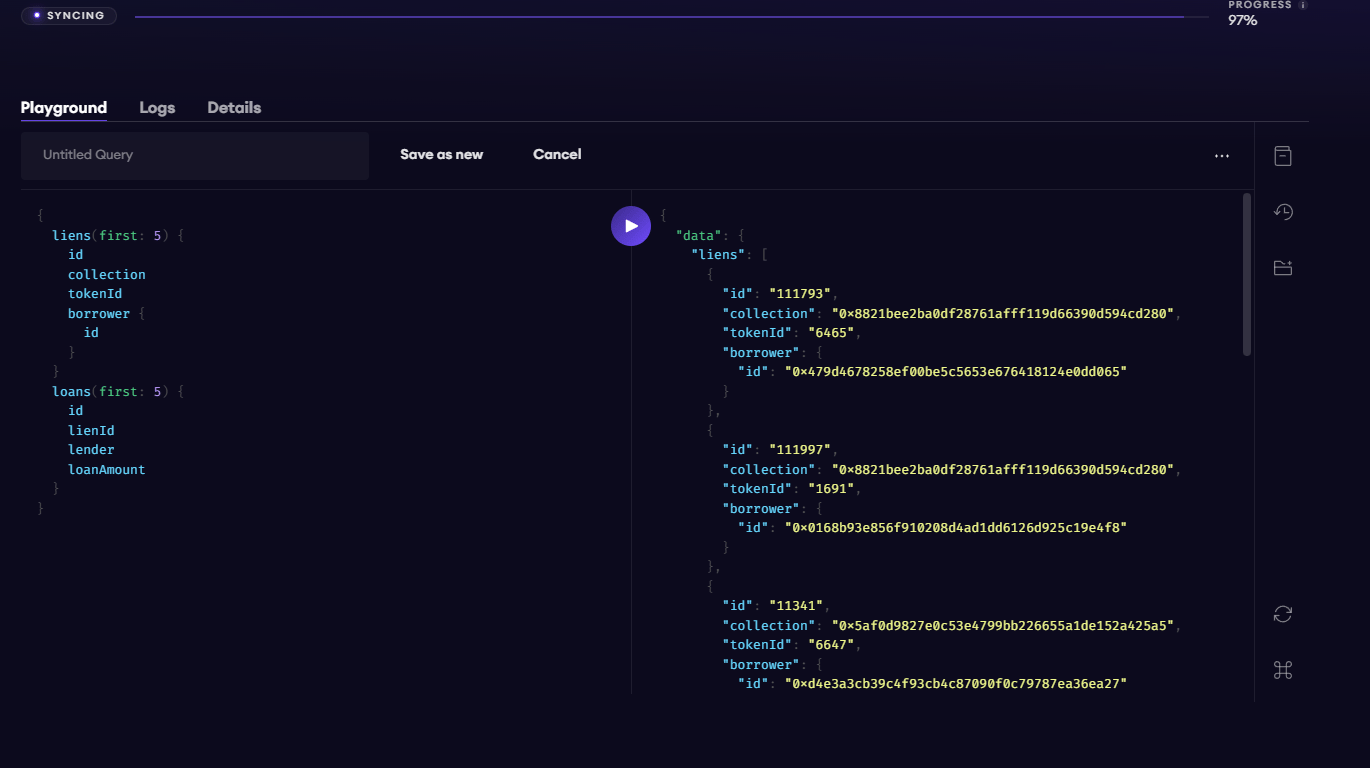
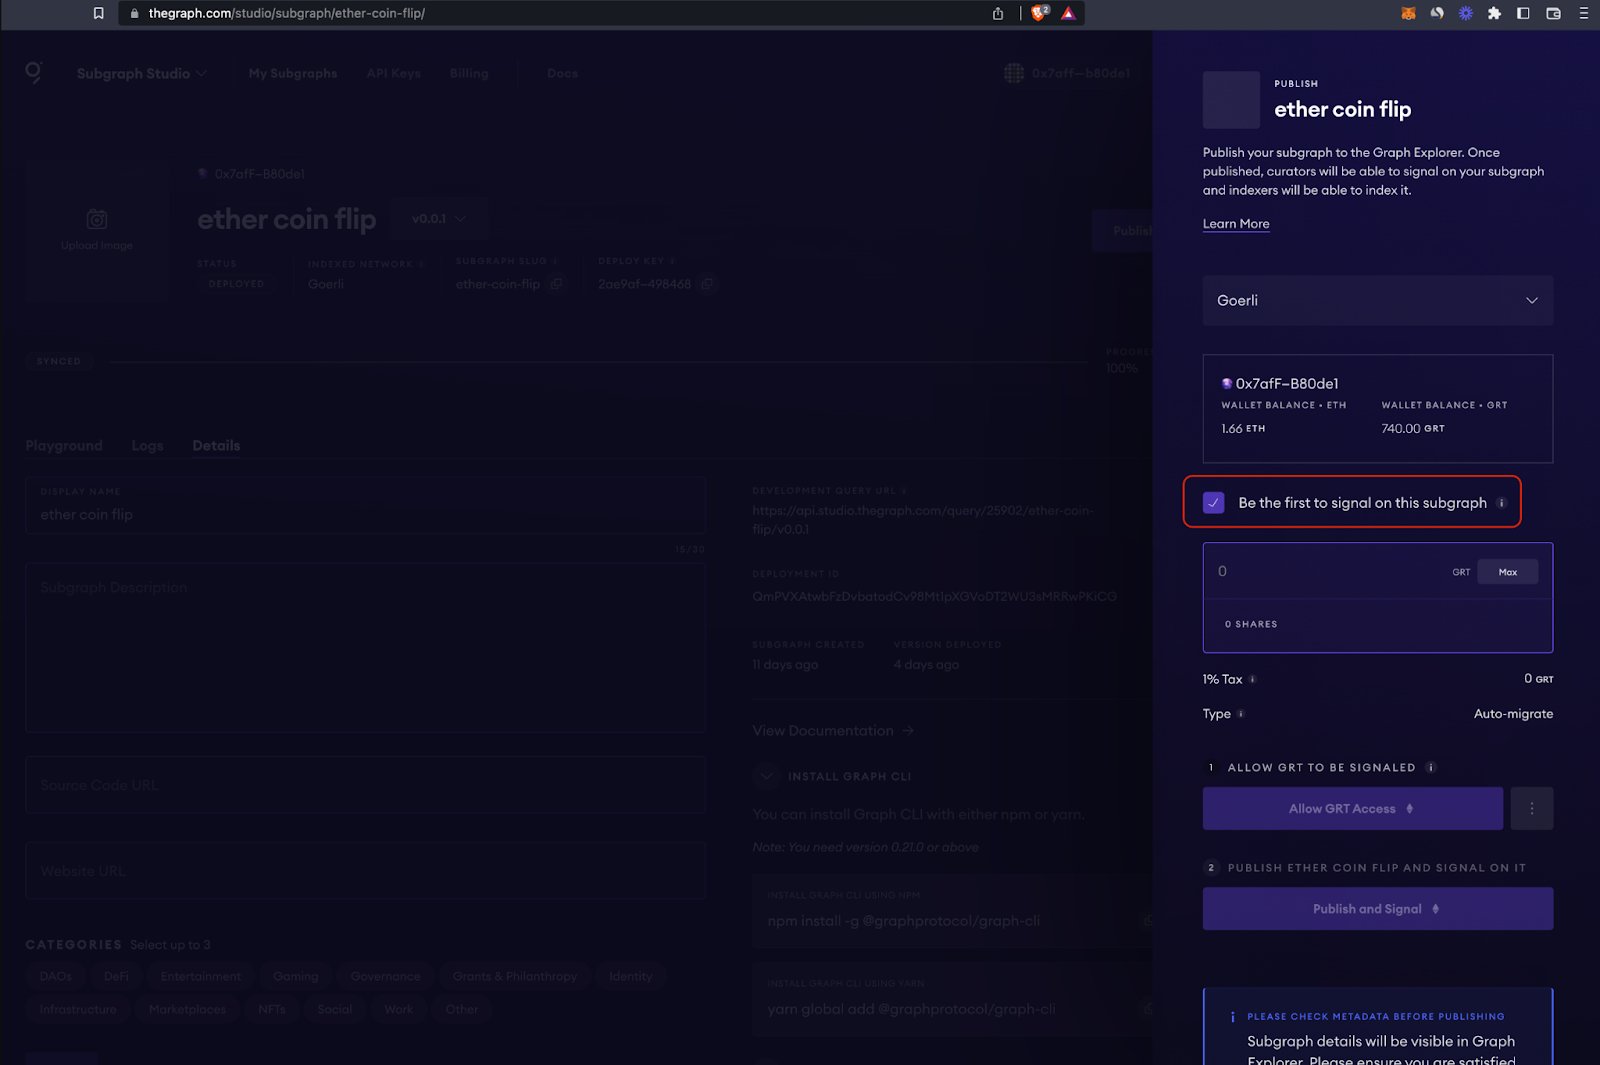
Publish your subgraph to The Graph’s decentralized network
When your subgraph is ready for production, you can publish it to the decentralized network. On your subgraph’s page in Subgraph Studio, click Publish: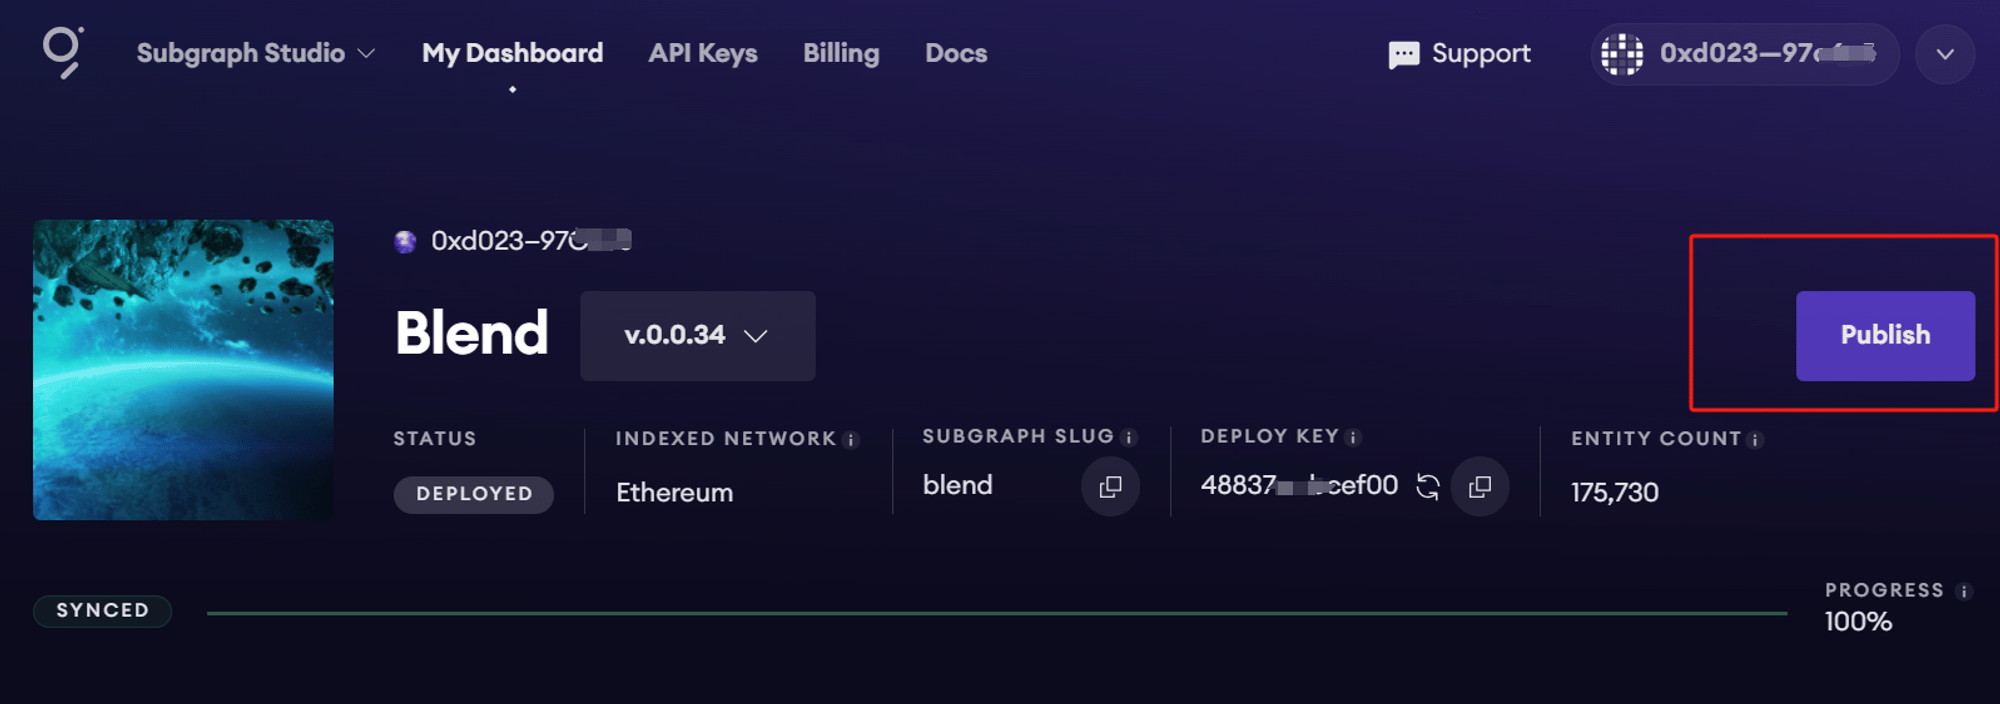
3. Query your subgraph
To query any subgraph on the decentralized network, pass a GraphQL query to the subgraph’s query URL. You can find the query URL at the top of the subgraph’s Explorer page. This example is from the CryptoPunks Ethereum subgraph by Messari: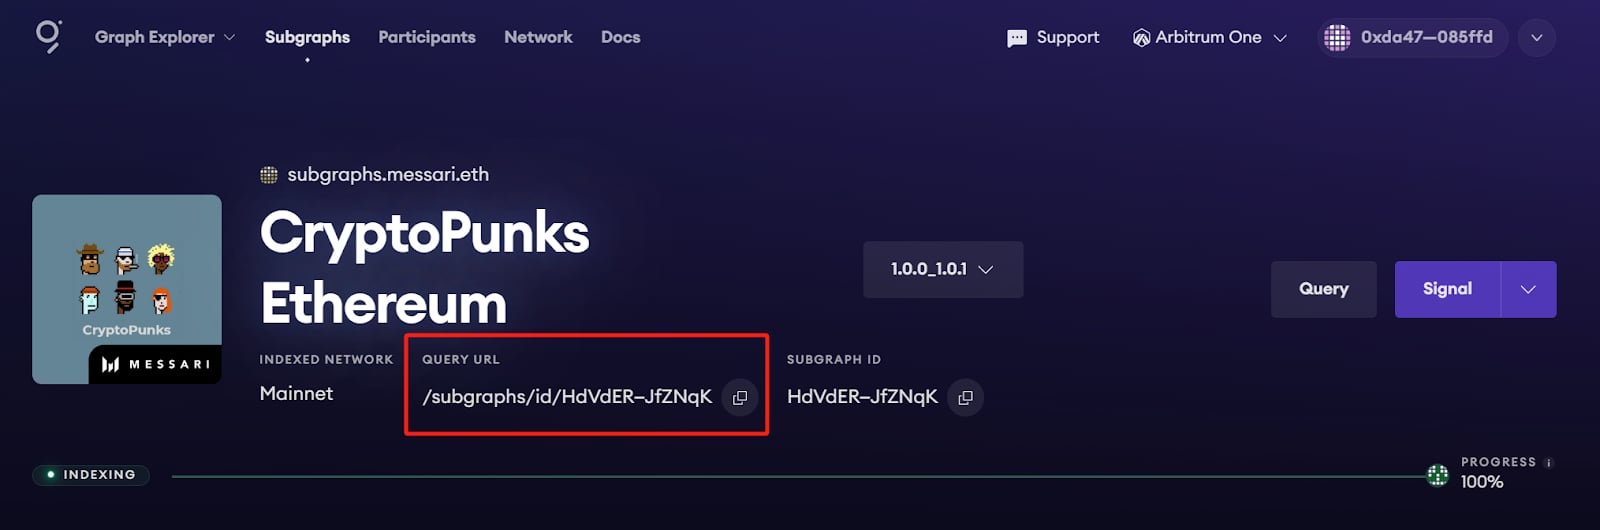
https://gateway-arbitrum.network.thegraph.com/api/[api-key]/subgraphs/id/HdVdERFUe8h61vm2fDyycHgxjsde5PbB832NHgJfZNqK
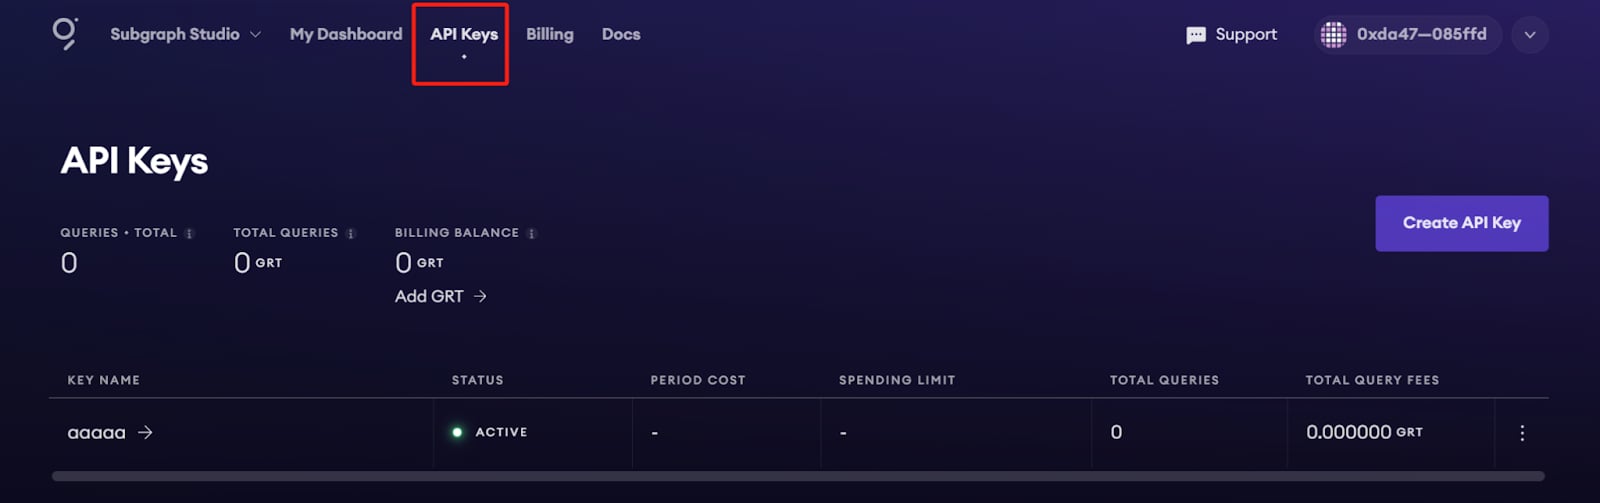
To send GraphQL queries to this endpoint, fill in your own API key.
Getting your own API key
Appendix
Sample query
This query shows the most expensive CryptoPunks sold.Sample code
Additional resources:
- To learn the ways that you can optimize and customize your subgraph for better performance, read about creating a subgraph.
- For more information about how to query data from your subgraph, see the querying documentation.